Design starts with an idea. Most of the time, that idea becomes a digital image. It can be a logo, a sketch, or a simple photo. But not all images are ready for real use. Many designs look good on screen but fail when printed or resized.
That is where Vector Artwork Conversion becomes very useful. It helps turn rough pixel images into clean and smooth designs. This step makes your artwork sharp, clear, and easy to use in many ways.
What Are Pixels and Why They Matter
Pixels are tiny dots. They make up your image. When you zoom in, you can see them.
Problems with Pixel Images
- They lose quality when resized
- Edges look rough
- Not good for large prints
A small logo may look fine on a screen. But when you make it bigger, it gets blurry.
What Are Clean Lines in Design
Clean lines mean smooth edges. They look neat and sharp.
Why Clean Lines Are Important
- Better print quality
- Easy to edit
- Works at any size
Clean designs always look more professional.
Pixel vs Line-Based Design
There are two main types of design.
Pixel-Based (Raster)
- Made of dots
- Loses quality when scaled
- Common formats: JPG, PNG
Line-Based (Vector)
- Made of paths
- Stays sharp at any size
- Common formats: SVG, AI, EPS
Designers prefer vector for logos and print work.
Why Designers Need Clean and Scalable Artwork
Your design should work everywhere. It should look good on a small card and a big banner.
Benefits of Scalable Designs
- No blur on large prints
- Easy to edit colors and shapes
- Faster workflow
If you want long-term use, always go for clean lines.
Real Experience: What Happens Without Proper Conversion
From my work, I have seen many bad files.
Common Issues
- Jagged edges
- Wrong colors
- Broken shapes
These problems waste time and money. Fixing them later is harder.
Steps to Turn Pixels into Perfect Lines
Now let’s go step by step.
Step 1: Start with a Good Image
Always use a clear image.
What to Check
- High quality
- No blur
- Simple design
A bad image will give bad results.
Step 2: Clean the Image
Before you convert, clean your file.
How to Clean
- Remove noise
- Fix rough edges
- Delete extra parts
Clean input gives clean output.
Step 3: Choose the Right Tool
Tools matter a lot.
Popular Tools
- Adobe Illustrator
- CorelDRAW
- Free tools like Inkscape
Pick one that fits your skill level.
Step 4: Trace the Image
Tracing is the main step.
Types of Tracing
Auto Trace
- Fast
- Good for simple designs
Manual Trace
- More control
- Best for complex designs
Manual work gives better results.
Step 5: Adjust the Paths
After tracing, check the lines.
What to Fix
- Smooth curves
- Sharp corners
- Even spacing
This step improves the final look.
Step 6: Set the Colors
Colors should be clear and bold.
Tips
- Use solid colors
- Avoid too many shades
- Match brand colors
Clean colors help in printing.
Step 7: Save in the Right Format
Now save your file.
Best Formats
- SVG for web
- AI for editing
- EPS for print
Choose based on your use.
Common Mistakes to Avoid
Even simple mistakes can ruin your design.
Top Mistakes
- Using low-quality images
- Skipping cleanup
- Overusing colors
- Not checking final output
Avoid these to save time.
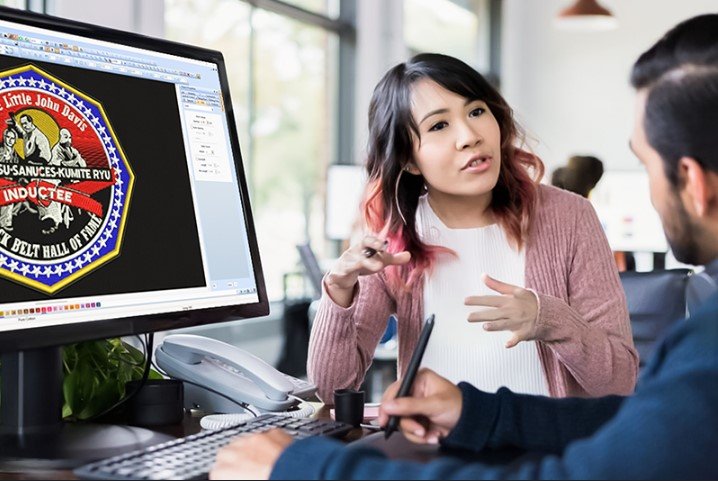
How Experts Handle This Process
Experts follow a clear method.
Their Approach
- Start with clean files
- Use manual tracing
- Check every detail
- Test before final use
Brands like Absolute Digitizer follow these steps daily. This ensures high-quality results every time.
Benefits of Proper Conversion
When done right, you get many benefits.
Key Benefits
- Sharp and clean design
- Easy editing
- Better print results
- Long-term use
This is why professionals always use this method.
Tools That Make Your Work Easy
You do not need many tools.
Basic Setup
- One design software
- A good image
- Some practice
Start simple and grow your skills.
Tips for Beginners
If you are new, do not worry.
Easy Tips
Start Small
Use simple logos first.
Practice Daily
Small steps lead to big results.
Learn Shortcuts
They save time.
Watch Tutorials
They help you understand better.
When to Hire a Professional
Sometimes, it is better to get help.
When You Need Help
- Complex designs
- Tight deadlines
- High-quality needs
Absolute Digitizer has real experience in handling all types of designs. Their team knows how to turn rough images into clean and usable artwork.
Building Trust with Quality Design
Good design builds trust.
Why Quality Matters
- Clients notice details
- Clean work looks professional
- Better results bring repeat work
Always aim for quality over speed.
Real-Life Use Cases
You will use clean designs in many areas.
Common Uses
- Logos
- T-shirts
- Banners
- Business cards
Each use needs sharp and clear lines.
Final Thoughts
Turning pixels into perfect lines is not hard. It just needs the right steps.
Start with a clean image.
Use the right tools.
Take your time to trace and fix details.
With practice, your designs will improve.
And if you want expert help, trusted names like Absolute Digitizer can guide you. They bring skill, care, and real experience to every design.